09-05-2008

As you can see, I have formed an "armateur" of sorts... from which other pieces will be attached and to serve as a guide an centerline to help me establish symmetry and balance. These pieces were simply cut from round steel stock, heated and shaped as needed, then tack-welded together for now. At this point, I am beginning to get a sense that, while the neck looked long enough in the reference painting, it isn't quite doing the job for me, so I think I will be extending it to gain better proportions. I also moved the left leg out and away from the body (again, as opposed to the painting), which will provide for better detail when the sculpture is complete.
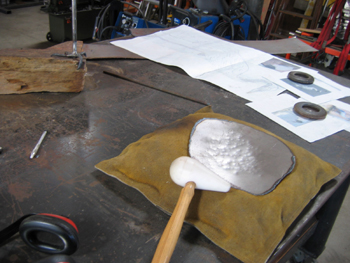
I needed to create some sort of body for this bird. I made a cardboard template of the Crane's body in the full scale working drawing, then traced that shape onto a piece of metal. I utilized relatively thin gauge sheet metal in order that I could shape it on the panel-beater's bag you see in the photo. This bag is leather and is filled with sand.
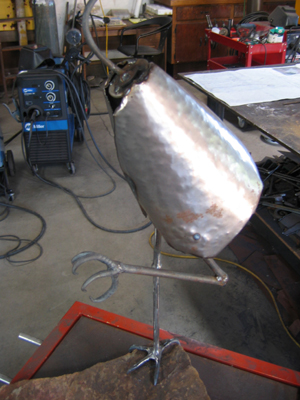
Here, you see the two side panels after being tacked to the armateur. This segment of the project will be very time consuming, as I need to make sure the resulting "body" will approximate an actual Crane in size, shape and proportion from every angle. I will heat, hammer, cut, bend and form these panels, as well as several other smaller patch panels, until I have the shape I am looking for. Then, I will be ready to think about making feathers and attaching them...